


Masking the Metaverse
MetaMask: What it is and how to get started.

This is not an ad for MetaMask or any other product/service mentioned in this newsletter. Though I would happily accept payment from any of them to support this newsletter if given the opportunity, I have not been given any such opportunity.
Every product I mention is something I use frequently in my day-to-day life, hence why I suggest them.
Happy Saturday, my friends. This week, I’m doing something a little different. Instead of my typical primer on a Web3 topic, I’m going to walk you through how to actually get started in Web3 on the Ethereum blockchain.
I want to shout out one of CryptoCurious’ readers for giving me the feedback that let me know I should do this. Caleb Givens (@calebgivens on Twitter) told me that some more in-depth walkthroughs on how to get a digital wallet, buy an NFT, or things of the like would greatly improve CryptoCurious, and I 100% agree! So, let’s do it:
Masking the Metaverse

MetaMask is pretty darn popular lately. It’s one of the most common non-custodial and digital Ethereum wallet providers and is what I use for everything.
You’re probably thinking: “What the frickle frack is a ‘non-custodial wallet’? You’re not throwing me random phrases, are you?”
Don’t worry, I try my best not to throw you weird phrases without explaining what they mean. The differences between non-custodial and custodial wallets are extremely important in this new world.
My Precious! Custodial vs. Non-Custodial
You’ve likely heard the saying “not your words, not your crypto” thrown around by Bitcoin maxis and crypto die-hards. Though very overused, it’s true. As I explained in the Blockchain article, crypto is called crypto because it’s built using cryptography. Wallets are accessed using a uniquely generated private key.
The key is, for readability, presented as a set of words that, when run through a hashing function, spits out a one-of-a-kind number that unlocks access to the wallet.
If you don’t have a private key, you don’t own the wallet or the funds. That’s a custodial wallet. The company or group providing the wallet to you has the private key and they approve transactions for you when you request one to be made. It’s called a custodial wallet because the provider has custody of your key.
Conversely, a non-custodial wallet is one where you own your private key and the provider is more of an interface to the things stored inside the wallet. The provider doesn’t know your key, and they can’t recover it for you if you lose it. It makes these kinds of wallets riskier if you lose the key, but you have the freedom to do whatever you please in the wide world of Web3.
We’ll cover this more later, but if you want to read some more on it now, here’s an awesome Gemini article that covers the subject a little more deeply.
Now that’s over with…let’s talk about how to set up MetaMask.
Getting Started
I’m going to do this on the Chrome browser with DuckDuckGo as my search engine, but any search engine should work and the compatible browsers are Chrome, Brave, Firefox, and Edge. The process for each should be fairly similar. Mobile is slightly different, but the setup is still the same. Just go to the App or Play Store and download the app.
First, go to the MetaMask website. It’s at metamask.io.

Click on one of the download buttons.

Click on the button that says “Install MetaMask for Chrome” (or whatever browser you’re using). This will bring you to the Chrome store. Add the extension.
It’ll bring up the popup below, don’t worry about it. Reading and changing data for all websites sounds scary. Like, really scary. This is only a general term though. MetaMask works by reading sites for Web3 connection opportunities (like a ‘connect wallet’ button on OpenSea). If it sees one, it opens a popup on top of the web page asking if you want to connect your wallet. It’s harmless and they don’t sell any of your data. Ever.
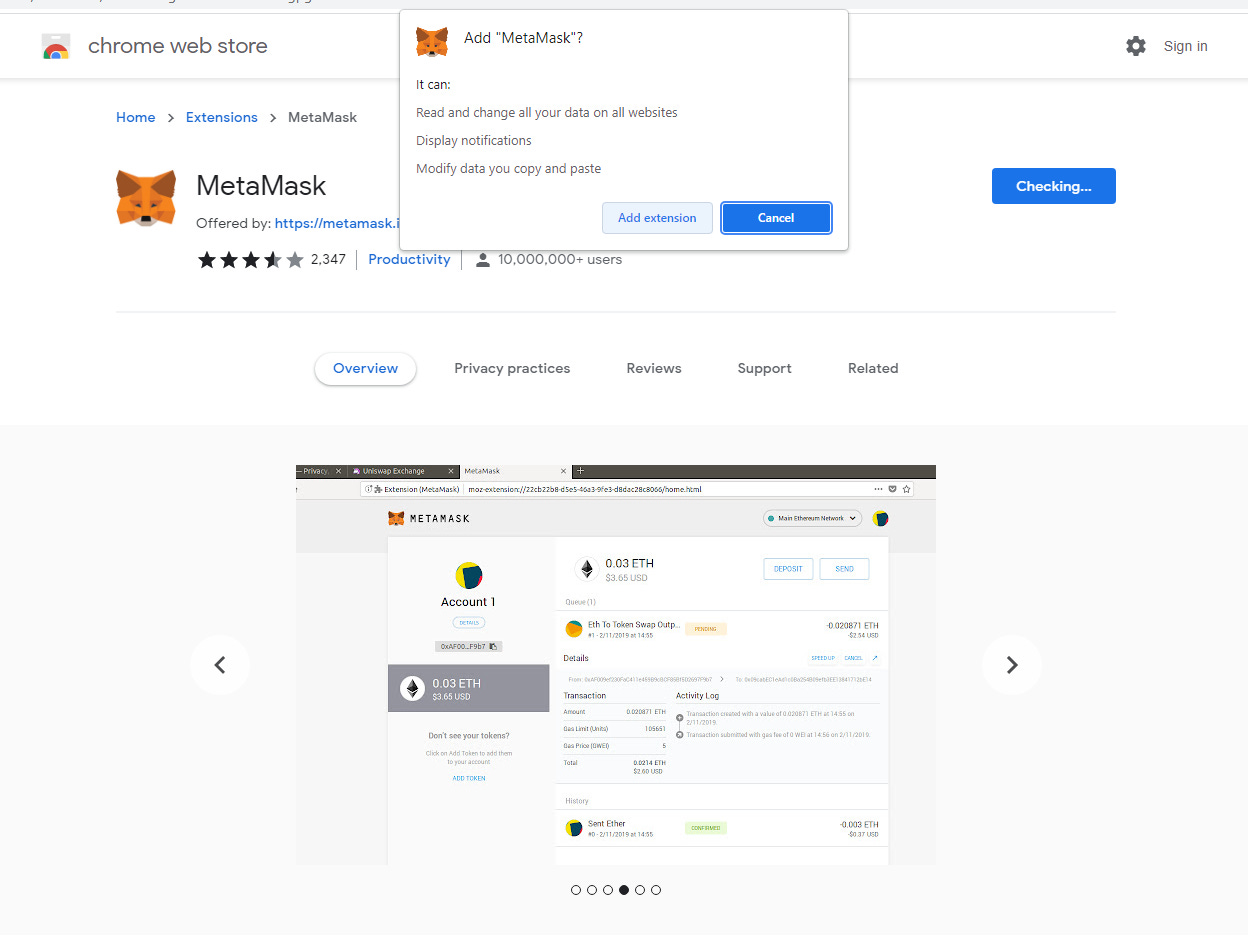
After adding it, you should see a screen similar to this:

After clicking ‘get started’, you’ll be presented with this page. If you’ve never owned an Ethereum wallet before, you’ll need to go for the ‘create wallet’ option. That’s the path I’ll be taking as well!
If you already have an Ethereum wallet, you can go down the ‘import wallet’ path. Also, I’m not sure why you’re still reading, but thank you! Love ya 😘

Now we’re getting into the juicy stuff. You’ll be asked to create a password. This isn’t your private key per se, but it’s still very important to keep hidden. If you can’t think of a strong password, I use passwordsgenerator.net to generate strong random passwords. What’s shown is the password I’m using for this example wallet.

Before continuing, I should mention that this wallet is purely for demonstration. I have no plans to put any money in this wallet and will dispose of it after this is published. Of course, now that you have the password and soon have the private key, you could easily access this wallet. Keep in mind though that everyone else reading this has the same information. This wallet is…pretty much useless.
Let’s move on to the next part!

I highly recommend you watch the video. It explains what your private or secret key is and some great ways to store it. It also goes over security issues like if someone asks for your key. (Spoiler: DON’T give it to them! You’ll lose all your money!)
After the video, you’ll get your own randomly generated secret key. The one for this wallet is…
“sketch forest shoot fame peace enjoy pledge cruise clay armed finish hub”

Remember, keep this safe! This is literally the key to everything you own on Ethereum. If it gets out, you’re screwed. That’s why this wallet is useless. Anyone can now access it.

Next, verify that you have the phrase. It’ll give you a jumbled list of the words and you have to sort them into the right order. Make sure you have your phrase written down!

Aaaaaaaaand…congrats! You just made your very own Ethereum wallet. Pretty cool, huh? Now let’s take a look at it.
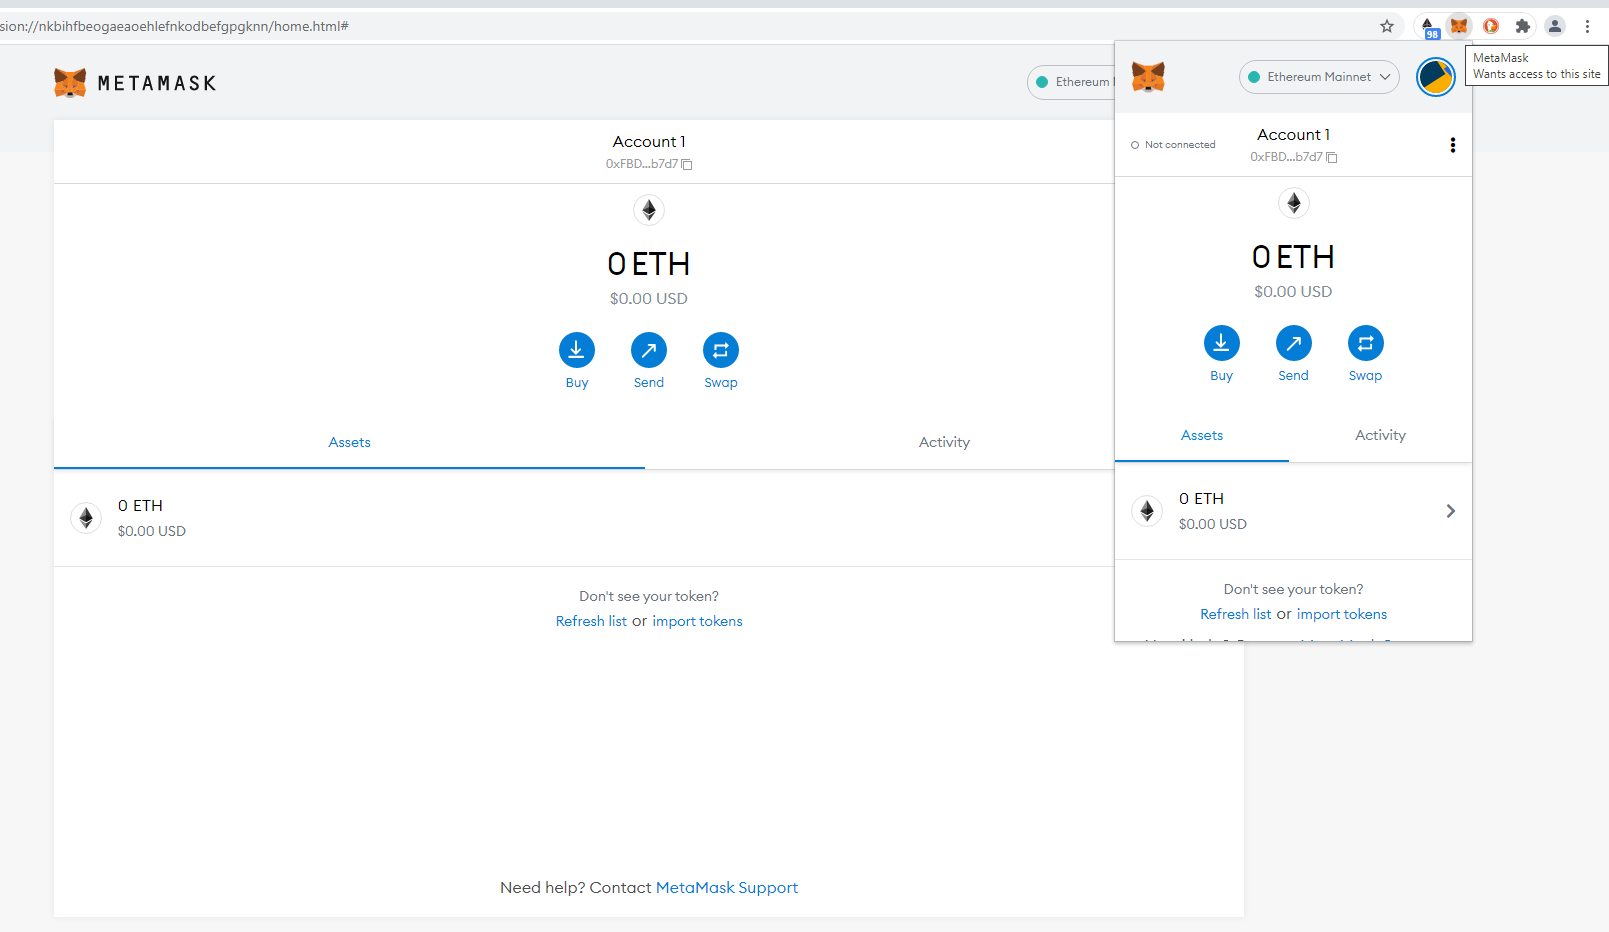
You can view the wallet interface from the extension’s page, but I think it’s far easier to use the browser extension itself. It has everything you need to interface with Ethereum right off the bat.
Wait…but what about the actual wallet address? Isn’t that pretty important?
Why yes it is! Take a look at the part of the interface that says ‘Account 1’. Just underneath it is the wallet address. Click on it once, and you have it copied! No need to memorize or type in a crazy weird hexadecimal number.

As you can see, that’s the full address for this test wallet. It’s the raw address, without any frills to make it human-readable. There are projects like ENS that allow you to buy ‘.eth’ domain names that translate to your raw address when money is sent to it. For example, my Solana version of this is ‘lucaswalters.sol’ and I want to get the same for Ethereum when I have enough saved up!
But I digress. After going through all of this, you’re pretty much a master at setting up an Ethereum wallet.
Very well done!